


Cover tutorial
I had already done one for my diary and it was instantly addicting so I had to try on a notebook... or 10... There is the tutorial for you for personnal use only of course.
J'en avais deja fait un pour mon agenda et j'avais tres envie de recommencer avec un carnet... ou 10.... Voila le tuto pour votre usage personnel bien sur.


Tracer autour du carnet - Trace around the notebook.

Add 1.5cm all around. Cut: that's your template for the outside and inside of the cover. The flaps are half the size of the template.
Ajouter 1.5cm tout autour. Couper et c'est votre patron pour l'exterieur et l'interieur du protege-cahier. Les rabats sont la moitie de la taille du patron.

Ca donne donc 1 rectangle pour l'exterieur et un autre de la meme taille pour l'interieur. 2 rectangles deux fois plus petits pour les rabats. Pour les rabats, au fer a repasser, rabattre 1cm et encore 1cm pour former un ourlet. Coudre. Le petit rectangle est en option pour une petite fantaisie pour le devant.
It gives you 1 rectangle for the outside and another one of the same size for the inside. 2 rectangles half the size for the flaps. For the flaps, fold 1cm and another 1cm with the iron. Sew along the edges. The little rectangle is for an optional little fancy bit for the front.

Si vous voulez ajouter une fantaisie sur le protege-cahier, c'est maintenant!
If you want to add a fancy bit at the front, now is the time!

Add the flaps on top on the outside rectangle wrong side facing up.
Ajouter les rabats sur le rectangle exterieur, avec l'envers du tissu vers le haut.

Ajouter le rectangle interieur avec l'envers du tissu vers le haut. Epingler.
Add the inside rectangle wrong side facing up. Pin.

Coudre a 1cm du bord en laissant une ouverture entre les deux rabats. Couper les coins.
Sew 1cm from the edge leaving an opening between the 2 flaps. Trim the corners.

Turn inside out. This is messy as the opening is quite small!
Retourner. Attention, c'est assez difficile car l'ouverture n'est pas large!

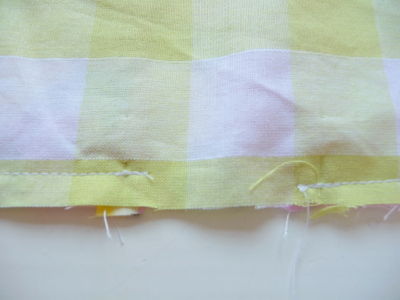
Repasser - Iron flat.

Coudre l'ouverture - Sew the opening.

Inserer le carnet - Insert the notebook.

Et voila! Et attention, quand vous en avez fait un, vous voudrez en faire d'autres...
Tada! A word of warning, when you have made one you'll want to make another one...


/https%3A%2F%2Fstorage.canalblog.com%2F84%2F40%2F244956%2F110152793_o.jpg)
/https%3A%2F%2Fstorage.canalblog.com%2F68%2F17%2F244956%2F110027583_o.jpg)
/https%3A%2F%2Fstorage.canalblog.com%2F17%2F61%2F244956%2F109879118_o.jpg)
/https%3A%2F%2Fstorage.canalblog.com%2F60%2F92%2F244956%2F109803722_o.jpg)